Working with media & files
A genealogy project is rarely just a .ged file — it’s the photos, scans, and documents that go with
it. Linea Codex keeps those alongside your records in the file manager, and links them to the
people and events they belong to through GEDCOM’s multimedia structures. This page covers managing
those files, how media connects to your records, importing a project archive, and cropping images.
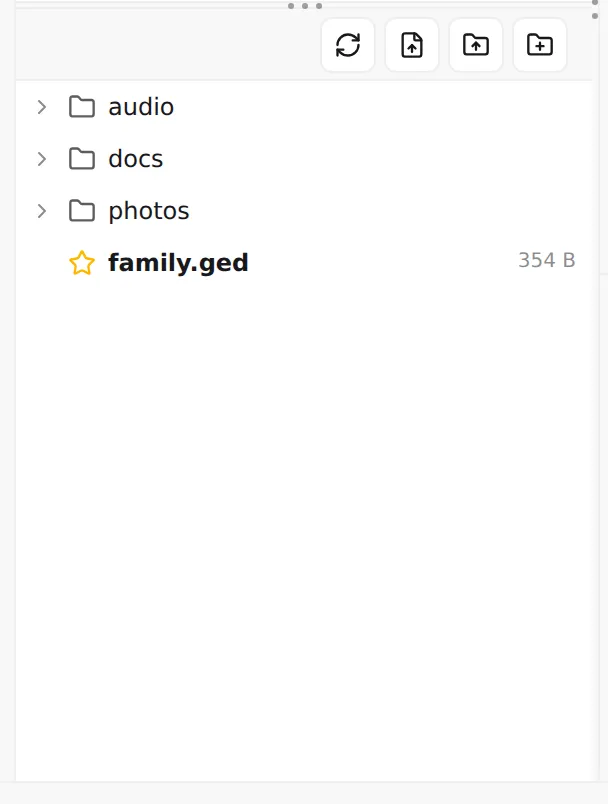
The file manager
Section titled “The file manager”The file manager is one of the two panels on the left of the workspace. Toggle it from the rail at the top of the panel: Files shows your project’s files, and GEDCOM Tree shows your records — you can have either or both open, with a draggable divider between them when both are visible. (For the tree side, see Navigating your tree.)
The Files panel lists everything in your project folder: the primary .ged file (marked as the
Primary file), any media you’ve added, and the folders you organise them into. A file that’s pointed
to by your records is marked Referenced by GEDCOM data, so you can tell at a glance which files are
in use.
Adding, organising, and removing files
Section titled “Adding, organising, and removing files”A small toolbar at the top of the panel handles the common actions:
- Upload file / Upload folder — bring photos and documents (or a whole folder of them) into the project. Large uploads ask you to confirm first; files that already exist are skipped, and you’re told how many.
- New folder — create a folder to organise media.
- Refresh — re-read the file list.
Right-click any file or folder for the rest: Copy path, Rename, Move to…, Download, Delete, and — on a folder — Upload file here and New subfolder.
How media connects to your records
Section titled “How media connects to your records”A photo on disk becomes part of a person’s story through a multimedia object — GEDCOM’s OBJE
structure. An OBJE carries one or more FILE lines naming the image, and a record (a person, a
family, an event) points at it. You don’t have to write that by hand: the
Inspector has a Media tab that shows the images attached to the
selected record as thumbnails, with the file path and a note of how each one is attached — for example
on this person. Clicking a thumbnail opens it; the path links back to the file in the manager.
Importing a project with its media
Section titled “Importing a project with its media”A bare .ged file names its photos but doesn’t contain them. To bring a project in with its media,
import an archive from the start page — Linea Codex reads
both plain ZIP bundles and the standard GEDCOM 7.0 GEDZIP format (it shows GEDZIP archive
detected when it recognises one). The media inside is unpacked into your project folder and the
FILE references line up with the unpacked files.
If an archive holds more than one GEDCOM file, you’re asked to pick the primary one — the data source for the project. (To export an archive back out, see Saving & exporting.)
Cropping an image
Section titled “Cropping an image”When a single scan holds several portraits — a family group, a page of cabinet cards — you can record which part of the image belongs to a person, without cutting the original. Open an attached image and choose Set crop, then drag a rectangle (or type exact pixel values for Top, Left, Width, and Height). Apply records the region; Remove crop clears it. The crop is stored in your file, not baked into the picture, so the original is untouched and the crop can be undone.
When a reference is broken
Section titled “When a reference is broken”If a FILE reference points at something that isn’t in your project — a missing file, or a path whose
letter-case doesn’t match — it shows up in validation rather than
failing silently. The validation panel flags the reference, and for these cases the editor often offers
a quick-fix to resolve the file reference or fix the case so the link lands on the right file.
The deeper mechanics of encoding and how embedded media is decoded live in Encoding & ANSEL — you usually won’t need them.
Next: Settings & preferences →